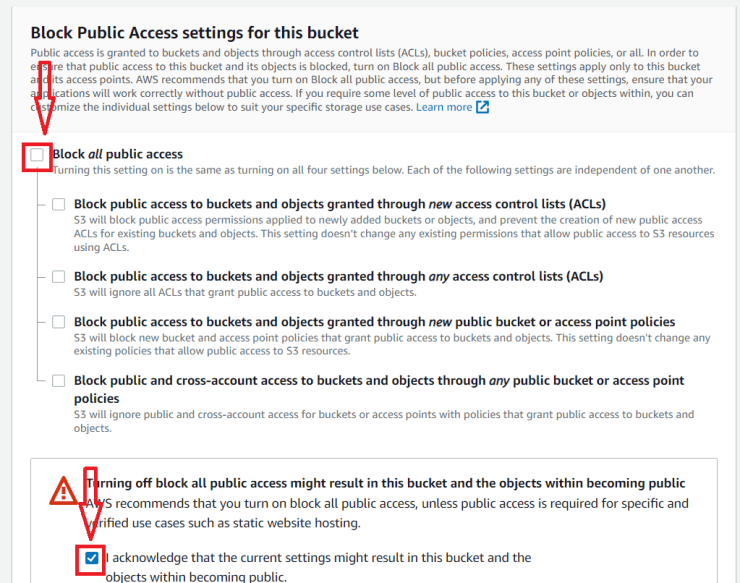
Creating Static website using S3 Follow these steps to host a static website on Amazon S3:First, create a bucket in Amazon S3 to store the content of the website.Then, configure the S3 bucket to enable website hosting and grant public read permissions to its content.Finally, upload the website content to the bucket by using the AWS Management Console or the AWS Command Line Interface (AWS CLI).Access the website at the endpoint URL that Amazon S3 assigns to it. The endpoint URL includes the bucket name and the name of the Region Step 1: Create a S3 bucket.1. Open management console click on services > Storage> S3 2. Click on Create Bucket 3. Write your website name in bucket name, choose AWS Region. 4. Choose ACLs enabled. 5. To make your website acceses to public uncheck Block all public access and check on I acknowlege. 6. Now, click on Create bucket button. Step 2: Uploading website files on S3 bucket.1. Your S3 bucket has been created, click on bucket name to open and upload website files. 2. Now, click on Upload button. 3. Here, you can drag and drop your website files. 4. This is how it looks like after you upload your website files. 5. In Permissions click on Grant public-read access and check I understand….. 6. Finally, click on Upload button. 7. After successfully uploading the file click on Close button. Step 3: Enabling the S3 bucket as Static Website Hosting 1. Click on Properties tab. 2. Scroll down till botton in Properties tab and click on Edit button on Static website hosting section. 3. Click on Enable, then write index.html under Index document. 4. Now, click on Save changes. 5. Here you can find the website link under Static website hosting that you have edited before, just click and check your website. 6. Here we go, just chek the website. Tags: L2DLearn2Done January 6, 2023 by Learn2Done AWS